No Mouse
Your Quick Start Guide
Installation Guide
Welcome to NoMouse! Follow these steps to get started quickly:
- Download the latest NoMouse .dmg for your Mac from the Home page. Choose your Mac’s architecture; if unsure, pick the “Universal” version.
- Open the downloaded file and drag NoMouse into your Applications folder.
-
NoMouse is notarized and fully trusted by Apple — no
security warnings will appear during installation.
If something acts differently, see the Troubleshooting Installation section below. -
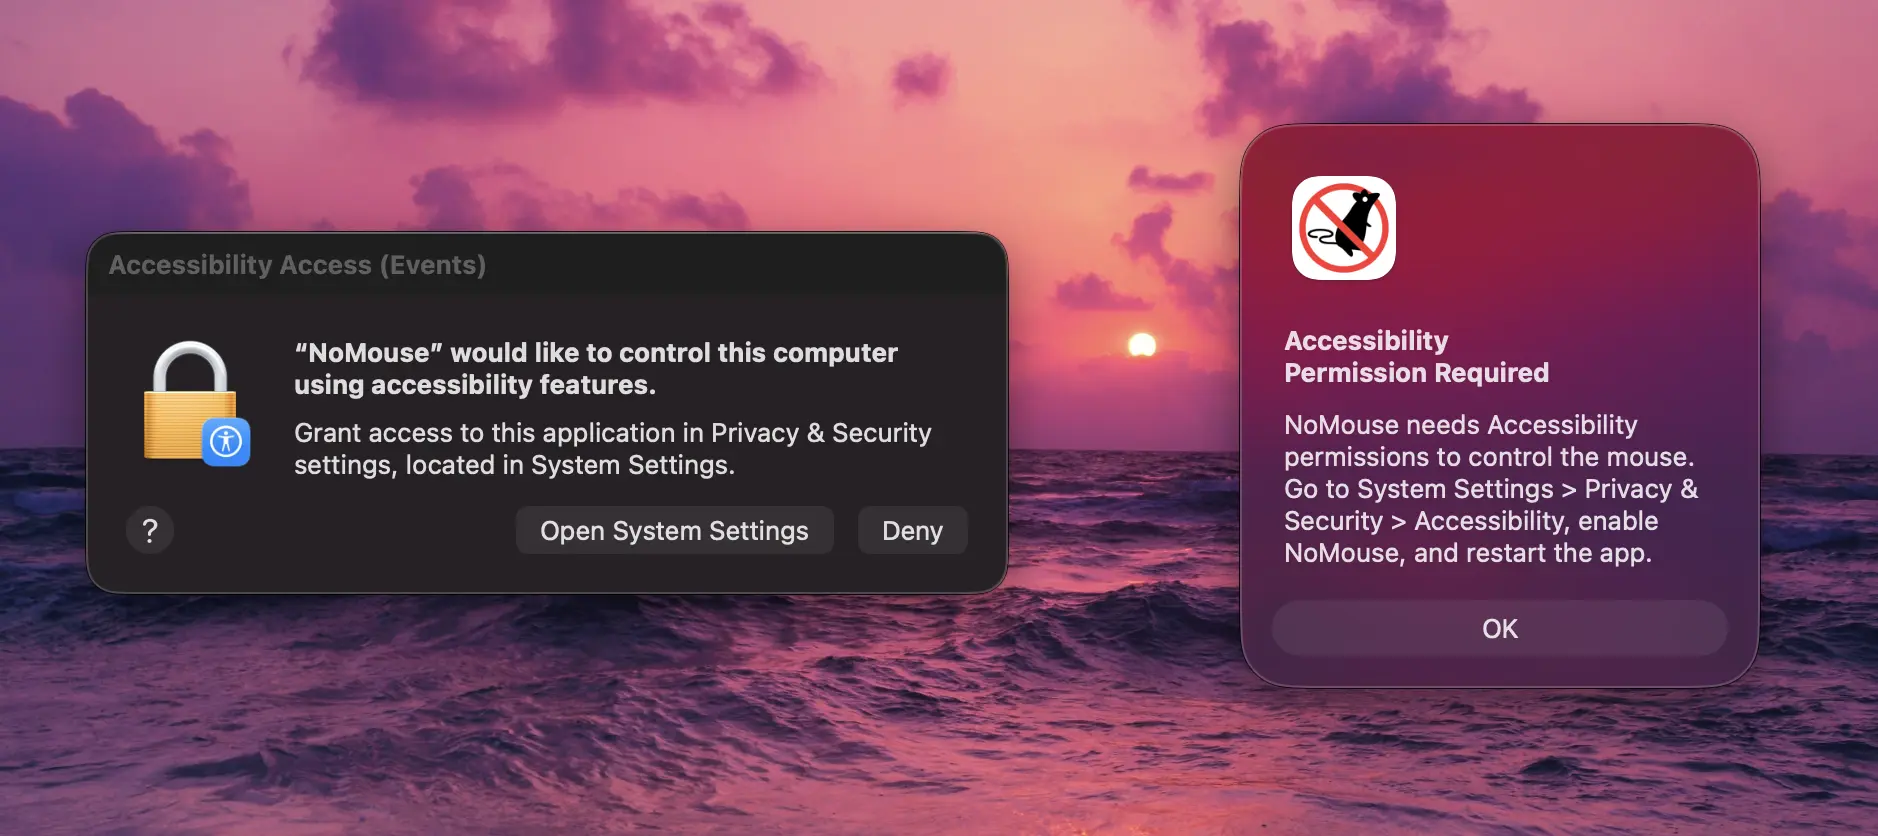
Launch NoMouse for the first time. You will be prompted
to give accessibility permissions. Click 'Open System
Settings'.
View Screenshot
-
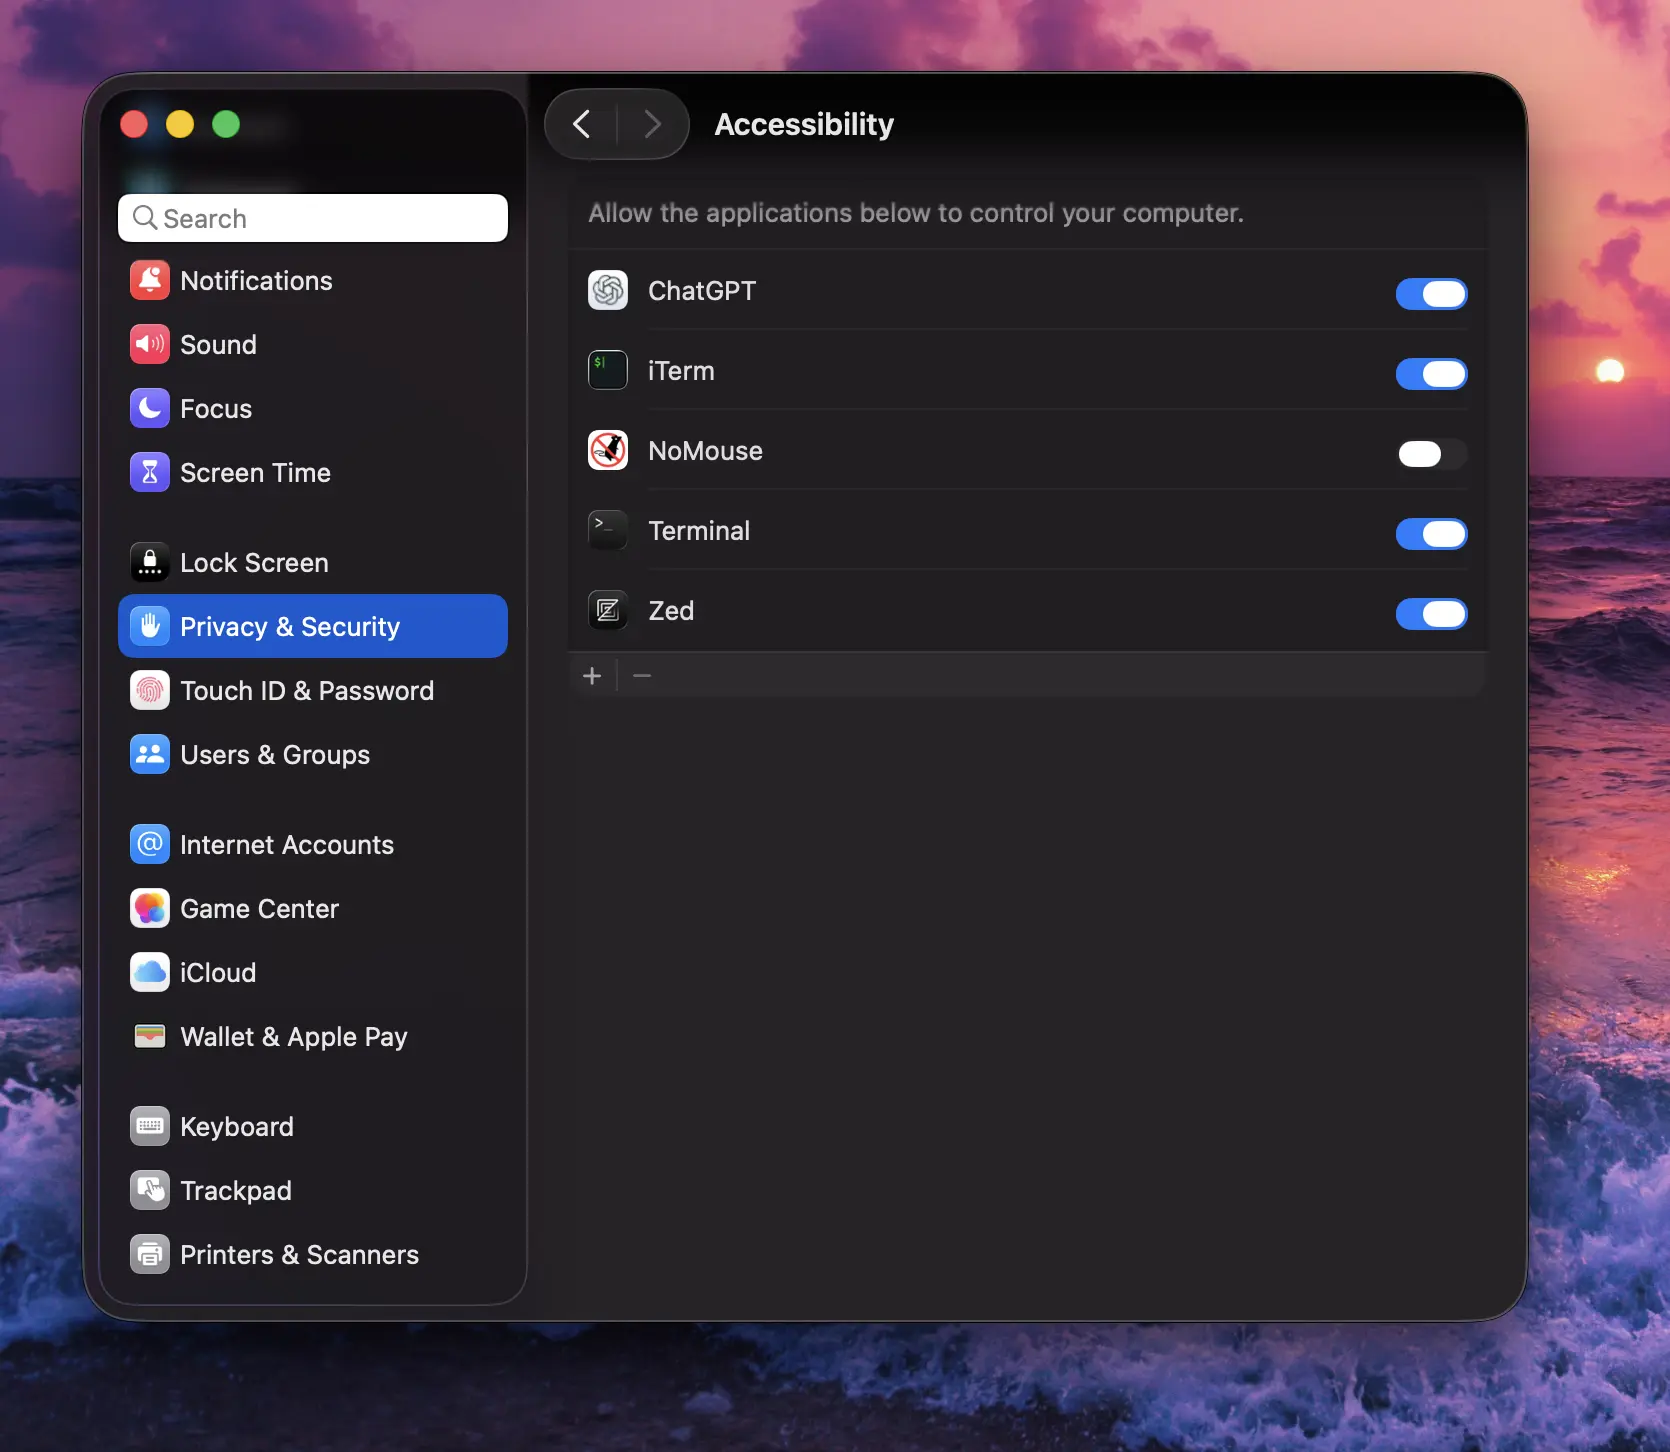
If you aren't already there, navigate to 'Privacy &
Security' then click on 'Accessibility' and enable
NoMouse. Confirm by entering your password if prompted.
View Screenshot
- Restart NoMouse and you should be good to go!
Usage Guide
Now that NoMouse is installed, here’s how to use it effectively:
⚠️ NoMouse is optimized for a layout like this. If yours differs, no problem — all keybindings can be customized to suit your setup:
View Keyboard
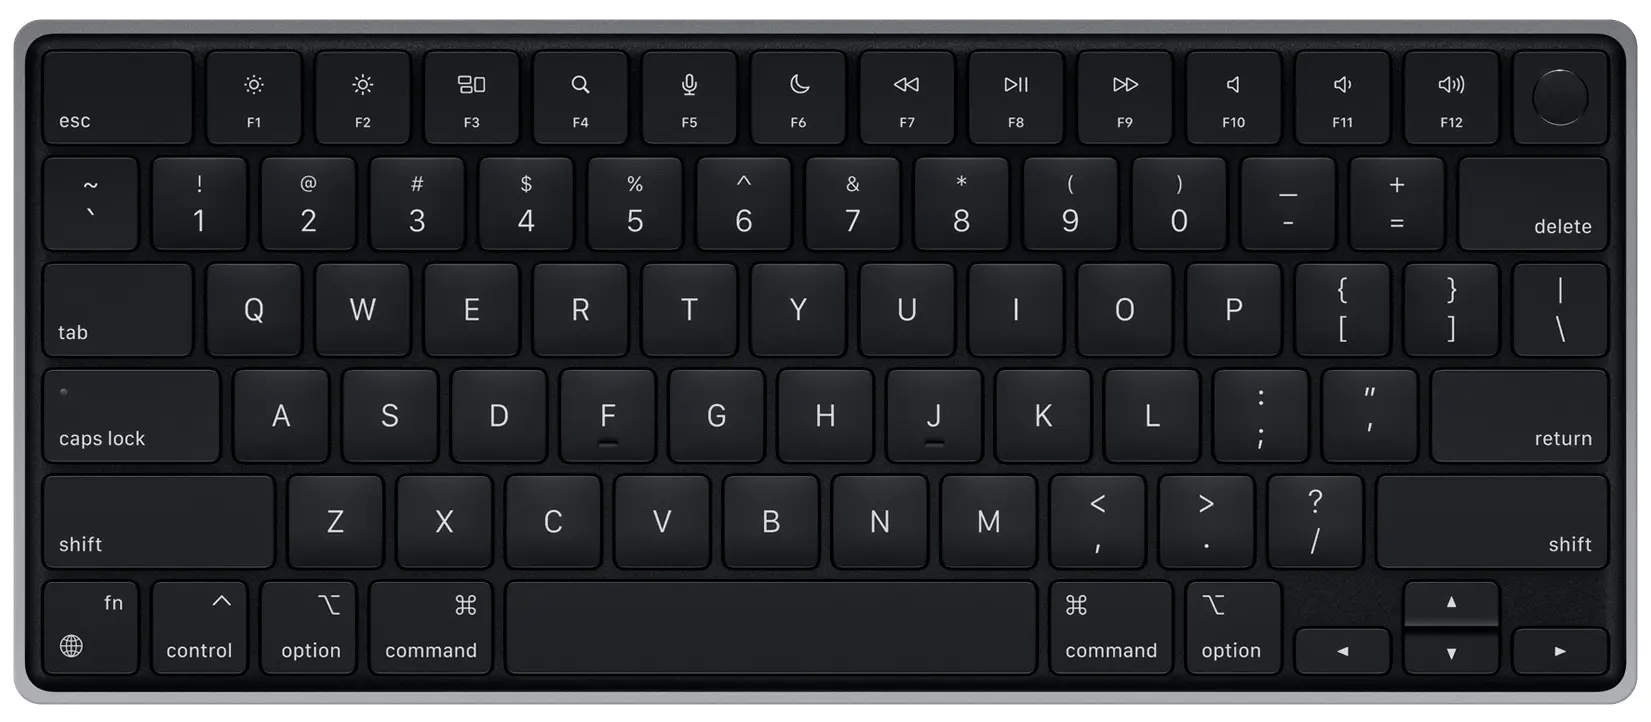
Default Controls:
- Press the Caps Lock key to toggle between normal typing mode and cursor mode.
- K – Move cursor left
- L – Move cursor down
- ; – Move cursor up
- ' – Move cursor right
- Combine directions (e.g. up + right) for diagonal movement.
- A – Reduce cursor speed by 75%
- S – Reduce cursor speed by 50%
- D – Increase cursor speed by 75%
- Speed multipliers are customizable in settings.
- , – Scroll down
- . – Scroll up
- O – Scroll left
- P – Scroll right
- F – Left click
- G – Right click
NoMouse runs in the background and doesn’t appear in the dock. You’ll find it in the toolbar instead:
View Screenshot
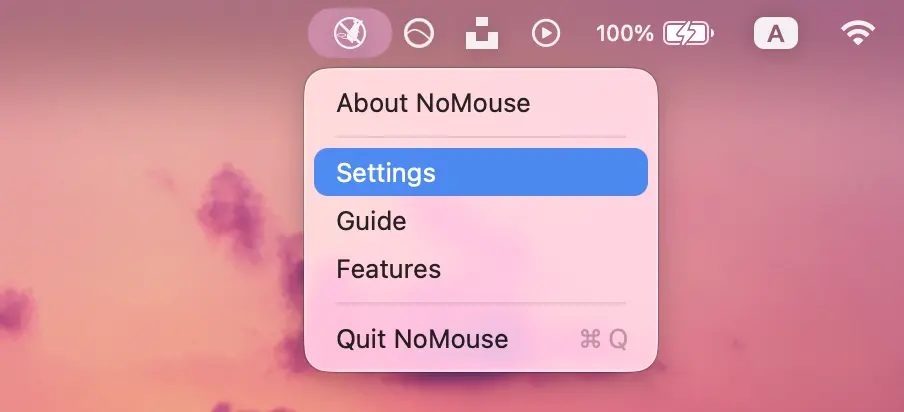
To adjust the default speed, change keybindings, or tweak speed multipliers, click the Settings button in the NoMouse toolbar popup.
Troubleshooting Installation
If you encounter unexpected macOS security warnings or blocked app messages, follow these steps:
-
⚠️ macOS Security Warning
When you open NoMouse for the first time, you might see this message:
"Apple cannot confirm that 'NoMouse' is free of malware that may harm your Mac or compromise your privacy."View Screenshot
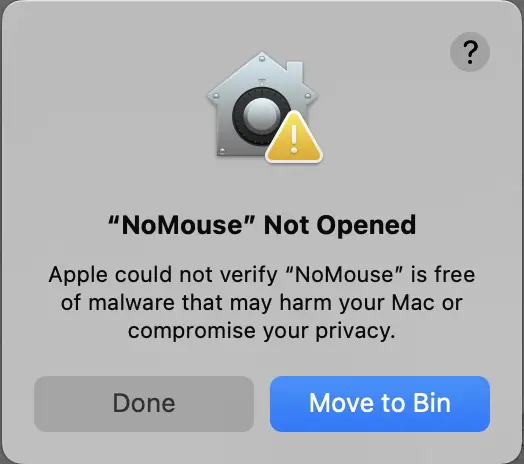
NoMouse is safe and secure despite this warning.
To proceed:
- Click Done to close the popup.
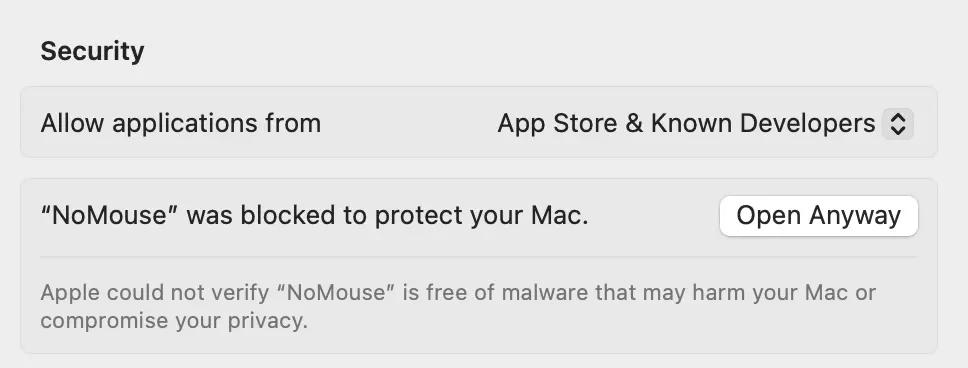
- Open System Settings → Privacy & Security.
- Scroll down to the Security section.
- You’ll see: 'NoMouse' was blocked from use because it is not from an identified developer.
- Click Open Anyway.
- Confirm by entering your password if prompted.
View Screenshot
Final Notes
Like anything new, NoMouse takes a bit of adjustment. The learning curve is short but steep — it may feel awkward at first, but most users adapt within a few hours. Once it clicks, it becomes second nature.
Want to support NoMouse and unlock powerful features? Here’s what NoMouse Pro offers:
View NoMouse Pro Features
- 🧲 Snap to Buttons – Automatically align the cursor with clickable elements
- 🧈 Smoother movement - Smooth out movements for a more natural cursor experience and more precise control
- 🤖 Automations – Build and trigger custom cursor workflows
- 📊 Statistics – Track time saved, actions performed, and usage trends
- 🌀 Screen Teleport – Jump the cursor to different screen areas instantly
- 📋 Clipboard Stack - Keep up to 10 recent clipboard items and paste any of them instantly
NoMouse Pro is currently in development and not yet available for purchase — but stay tuned!
🚨 macOS shows a popup when toggling Caps Lock (used by NoMouse to switch modes). If that bothers you, you can disable it manually:
Click the "Disable CapsLock Popup" option from the NoMouse toolbar menu. It will copy a command to your clipboard. Paste it into your Terminal and hit Enter. You may be prompted for your password.